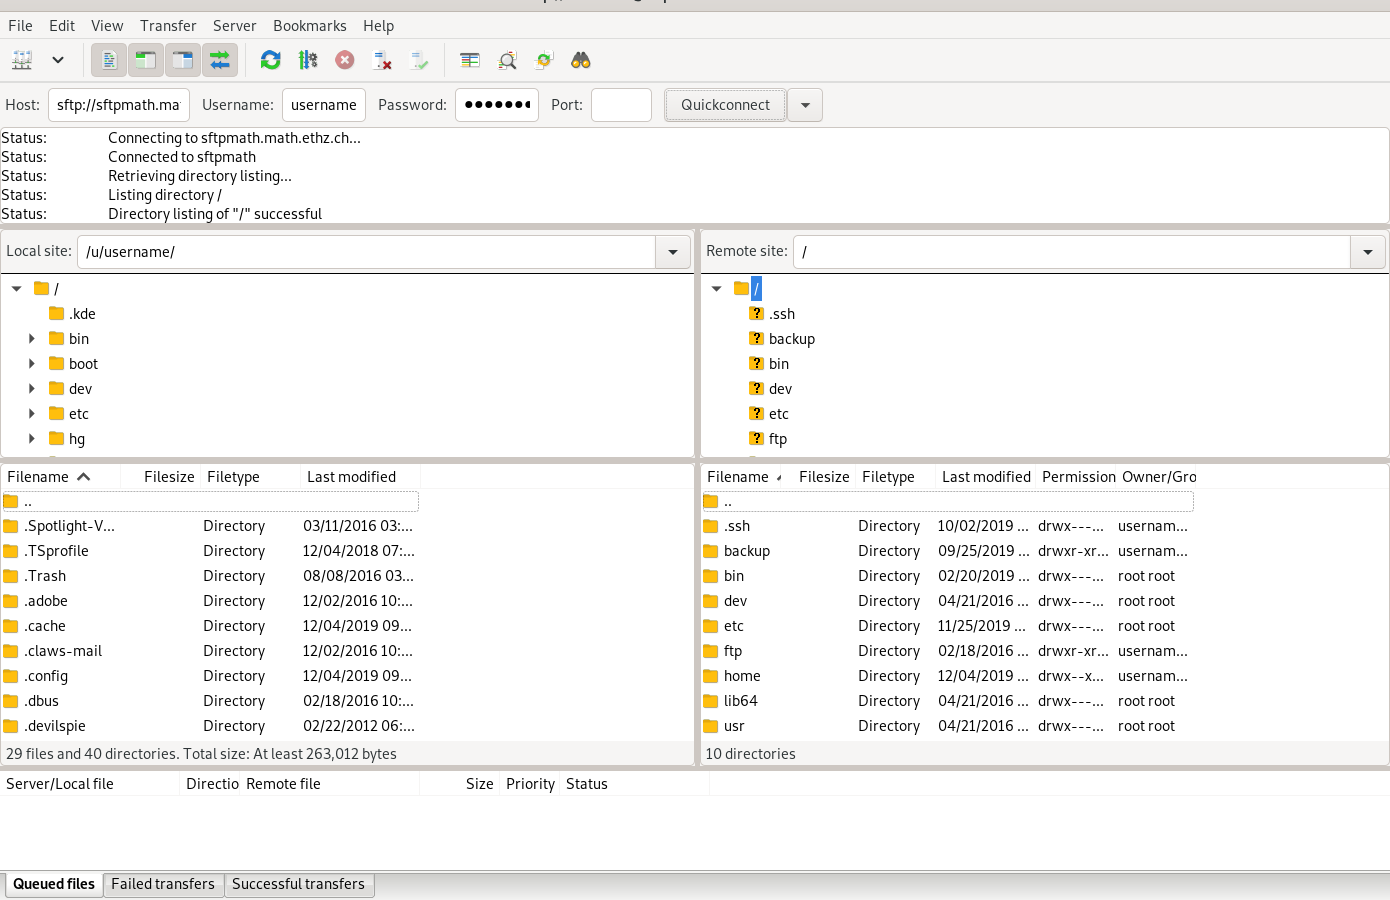
You can access your files that you have on the server via Samba (recommended for administration staff and also for all macOS users) or via SSH (ssh, sftp, rsync, unison, …)
Access via Samba (VPN needed!)
Connect to:
smb://shares.math.ethz.ch (macOS & Linux)
\\shares.math.ethz.ch (Windows)
and login with your eth-username and your e-mail password.
MacOS
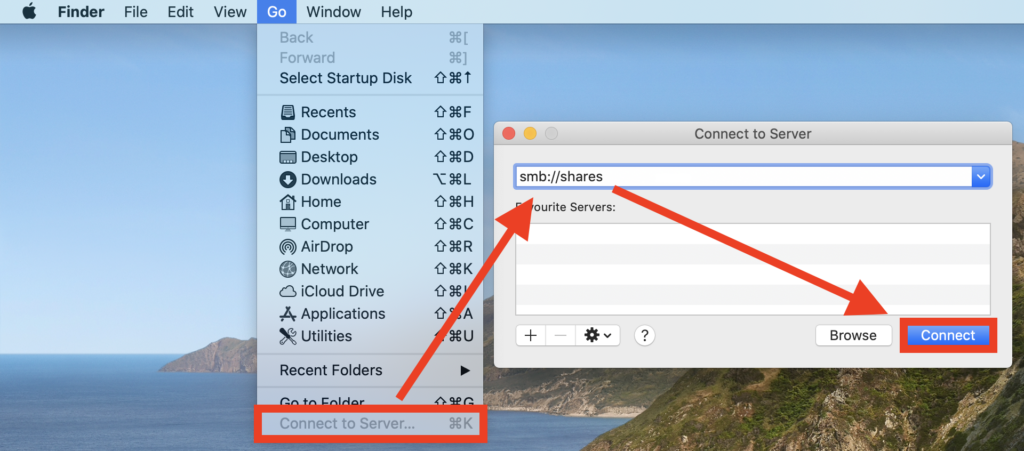
Select the Finder, in the menu Go, click on Connect to server…, enter the address smb://shares.math.ethz.ch, click on Connect and authenticate. Afterwards you will be prompted to select a “volume” like “your-eth-username”, “www” or “share-xyz”.
Linux
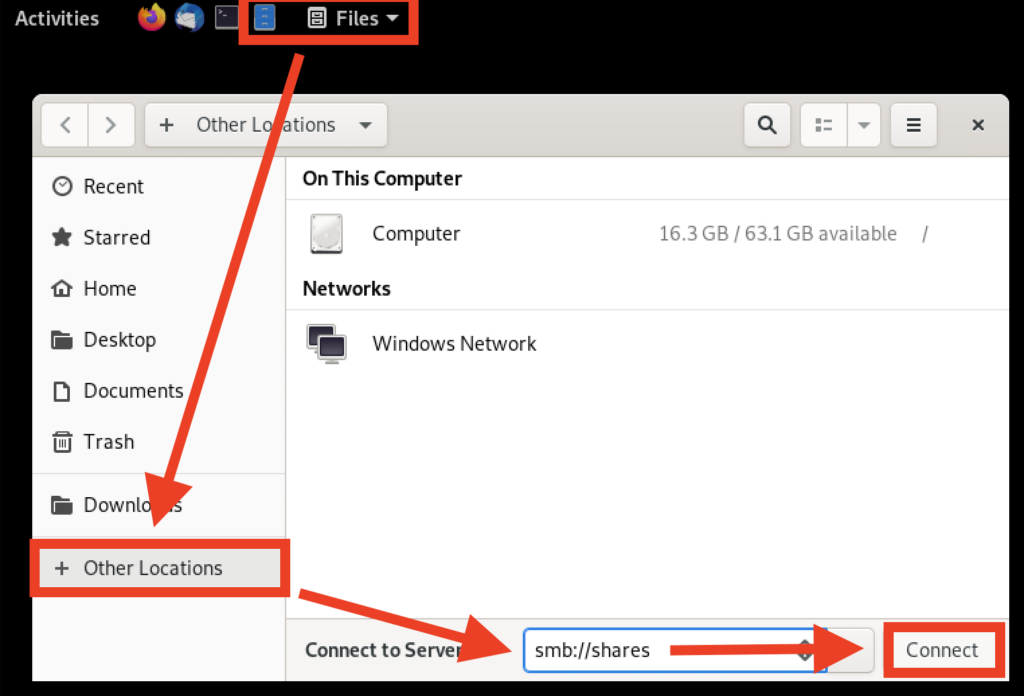
Open Files (Nautilus), click on Other Locations, enter the address
smb://shares.math.ethz.ch/NAME_OF_THE_SHARE
click on Connect and authenticate.
Windows
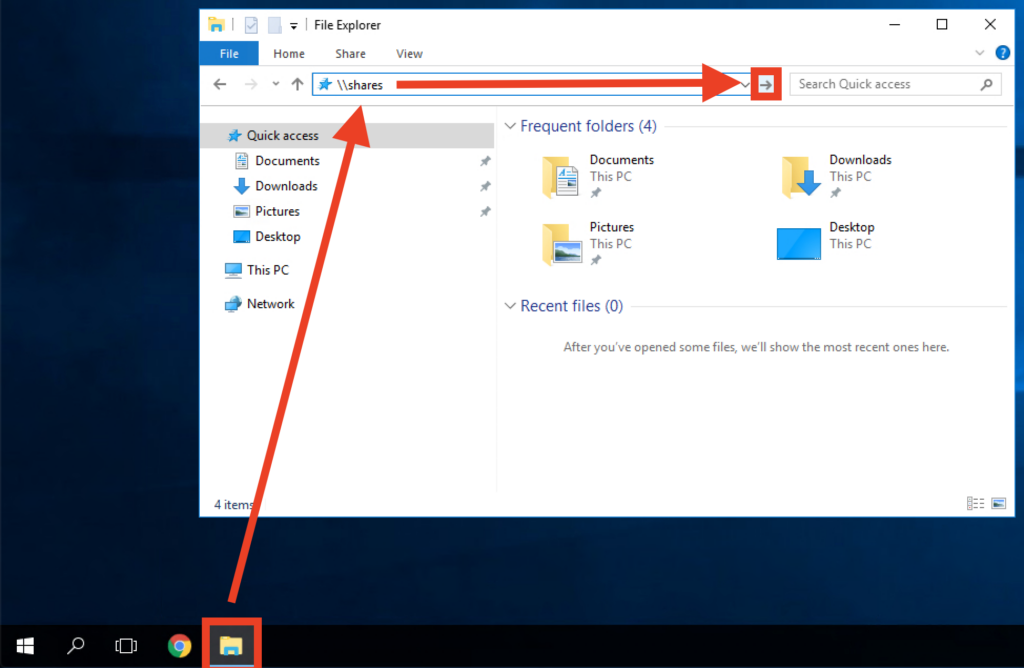
Click on the Start button, enter run, enter the address \\shares.math.ethz.ch and authenticate. Afterwards you will be prompted to select a share like “your-eth-username”, “www” or “share-xyz”.
Access via SSH
The official SSH/SFTP server of the D-MATH is sftpmath.math.ethz.ch but with the “home office” setup (in particular using the “math-guest” or the “math-clients” VPN) you can access almost all linux computers of the department, in particular all Central Clients (ex. ion-*, ada-*).
Please be careful when using external cloud services (such as Overleaf, Dropbox, DeepL, …) and try to make regular backups on your local device (laptop) or, even better, on the departmental file server.
The usage of some external cloud services has been approved (at least partially) by the CISO and the central IT services.
All the accounts of D-MATH members are going to be migrated to the Microsoft cloud in the week of October 21 – 25, 2024.
This means that all the mail accounts will have to be reconfigured, i.e. the old mail account has to be deleted from your mail application and then the new account has to be added. You’ll find links on how to do that below.
Since Fedora 39 sagemath is not included as a package anymore. There are several possibilities you can use sagemath on Fedora, let’s highlight two:
Using the offical docker image
Installing it with conda
Podman
sagemath commandline
As our installation provides a fully configured rootless podman configuration, you can for example use the following commands to run the sagemath image:
# connect to a central client
ssh ada-X
# start tmux, alternativly you can use screen
tmux
# create a .sage folder
mkdir $HOME/.sage
# run sage with your home mounted to /home/sage/mydata and a mounted .sage
podman run --user 0 -ti -v $HOME/.sage:/home/sage/.sage -v $HOME:/home/sage/mydata sagemath/sagemath:latest
# to detach from the tmux session use the following keystrokes
#CTRL+B then D
To add a additional folder you can put a other -v parameter, for example:
-v /userdata/username:/home/sage/mydata2
sagemath jupyter notebook
When you want to use the sage jupyter notebook, you can do the following:
# connect to a central client
ssh ada-X
# start tmux, alternativly you can use screen
tmux
# create a .sage folder
mkdir $HOME/.sage
# run sage jupyter on port 8888
podman run --user 0 -p 8888:8888 -v $HOME/.sage:/home/sage/.sage -v $HOME:/home/sage/mydata sagemath/sagemath:latest sage-jupyter --allow-root
# to detach from the tmux session use the following keystrokes
#CTRL+B then D
Then open a second terminal on your local machine and open ssh tunnel to the ada:
# port forward from to ada-X
ssh -t username@ada-X -L 8888:localhost:8888
# Open webbrowser using the url with token shown in the output.
Conda
Please follow the official installation instruction:
By following the few steps below, you can send a request for a room reservation. Your request will then be reviewed and approved or rejected in a reasonable time frame.
The following setup can be used to setup a moodle development environment, with rootless podman:
# D-MATH link podman-compose
ln -s /usr/bin/podman-compose ~/bin/docker-compose
# D-MATH clone moodle-docker repo
git clone https://github.com/moodlehq/moodle-docker.git
cd moodle-docker
# D-MATH set variablesexport MOODLE_DOCKER_DB_PORT=15432
export MOODLE_DOCKER_APP_VERSION=18080
export MOODLE_DOCKER_SELENIUM_VNC_PORT=15900
export MOODLE_DOCKER_WEB_PORT=18000
# Change ./moodle to your /path/to/moodle if you already have it checked outexport MOODLE_DOCKER_WWWROOT=./moodle
# D-MATH add custom configuration
cat <<EOF > local.yml
services:
webserver:
volumes:
- "${MOODLE_DOCKER_WWWROOT}/../moodledata:/var/www/moodledata"
db:
environment:
PGDATA: /var/lib/postgresql/data/pgdata
volumes:
- "${MOODLE_DOCKER_WWWROOT}/../database:/var/lib/postgresql/data"
EOF
# Choose a db server (Currently supported: pgsql, mariadb, mysql, mssql, oracle)export MOODLE_DOCKER_DB=pgsql
# D-MATH creating files with group access for moodle codeumask 007
# Get Moodle code, you could select another version branch (skip this if you already got the code)
git clone -b MOODLE_404_STABLE git://git.moodle.org/moodle.git $MOODLE_DOCKER_WWWROOT# D-MATH add folder for moodle data
mkdir moodledata
mkdir database
# D-MATH setgid for automatic setting group permission
chmod 2770 moodle
chmod 2770 moodledata
chmod 2770 database
# Ensure customized config.php for the Docker containers is in place
cp config.docker-template.php $MOODLE_DOCKER_WWWROOT/config.php
# D-MATH set the permission to 33 inside the container for moodle code
podman unshare chown 33 -R moodle
podman unshare chown 33 -R moodledata
podman unshare chown 999 -R database
# Start up containers, choose docker.io to download the images
bin/moodle-docker-compose up -d# Shut down and destroy containers#bin/moodle-docker-compose down
Above we set the webserver port to 18000 so this means you now need connect to http://localhost:18000 in your browser to see the application.
Volume Permissions
If you have added new files from outside the container, you need to re-apply the correct permissions. Let’s say you have added files inside the moodle folder, then you need to run the following command:
# set the permission to 33
podman unshare chown 33 -R moodle
Visual Studio Code
To prevent the above Volume Permission problem, you can connect your locally installed Visual Studio Code to the running container:
Specifically for Linux users, but also for Mac users, we provide Microsoft Office (Word, Excel, PowerPoint & Outlook) and Adobe Acrobat in a Windows environment. To access the applications and open your files (which you have stored on the server), follow these instructions.
Do you still recompile and run your program (and ideally your tests) after every change, like developers did 20 years ago? Do your teammates still bother you about your specific setup that, which is needed to compile/run your projects? Well, then we’ve got some news for you!
If you want to develop something for kubernetes, you may need to run minikube. This can be done on our linux installations, the following commands should start a working “kubernetes cluster” on your installation:
mkdir ~/bin/
wget https://storage.googleapis.com/minikube/releases/latest/minikube-linux-amd64 -O ~/bin/minikube
chmod 755 ~/bin/minikube
cd ~/bin/
./minikube config set rootless true
./minikube config set driver podman
./minikube config set container-runtime containerd
./minikube start --cni calico
After minikube has started you can check all running pods with the following:
minikube kubectl -- get pods -A
You can also install kubectl and helm in your ~/bin if you like:
This describes how to create a local folder in which you can move emails, which will still be available in the evolution mail client. So the mails will be removed from the mailserver and saved into a folder, which you have to backup.
Requirements:
You already use evolution as your mail client
You make backups of your local files and folders
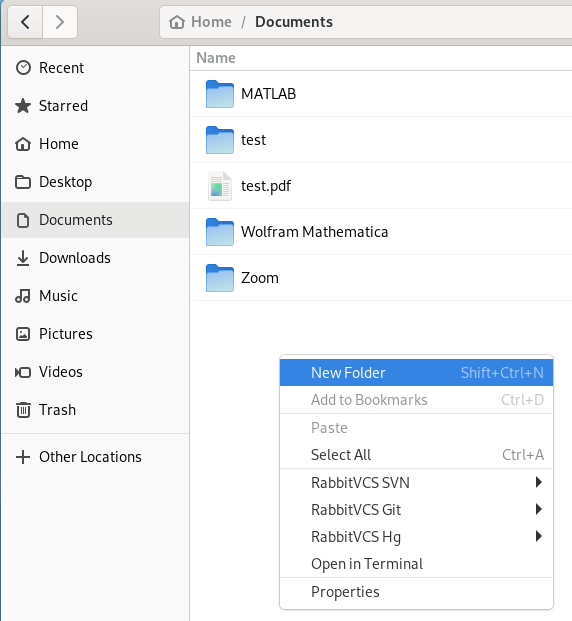
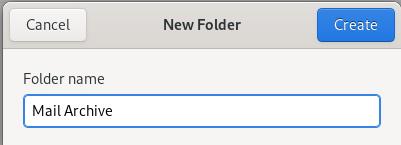
First create a folder in the filesystem, which will hold your mails:
Now open evolution and start adding a new mail account:
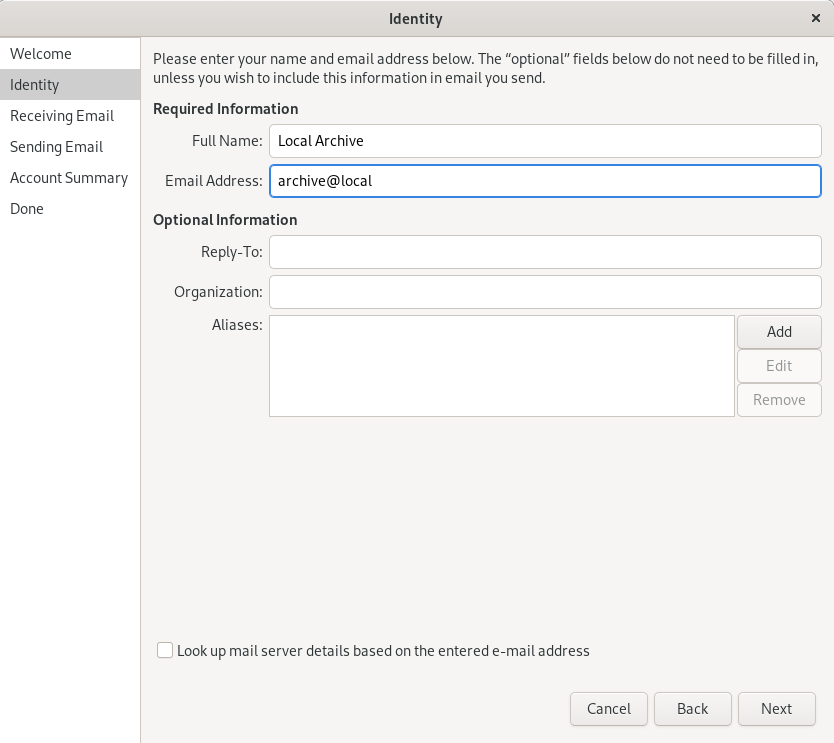
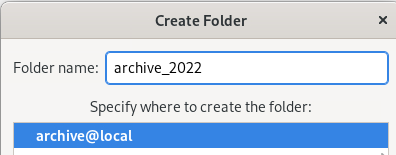
This account will be your local archive, so you can give it a meaningfull name, ex. “Local Archive”. As for the email address you can type in a non existing one, i suggest “archive@local”, this names will help to identify it in evolution later:
After hitting “Next” choose “Standard Unix mbox spool directory” as Server type:
For the “Spool Directory” choose the folder you have created above:
On the next page activate the following:
Choose “None” as the “Server Type”:
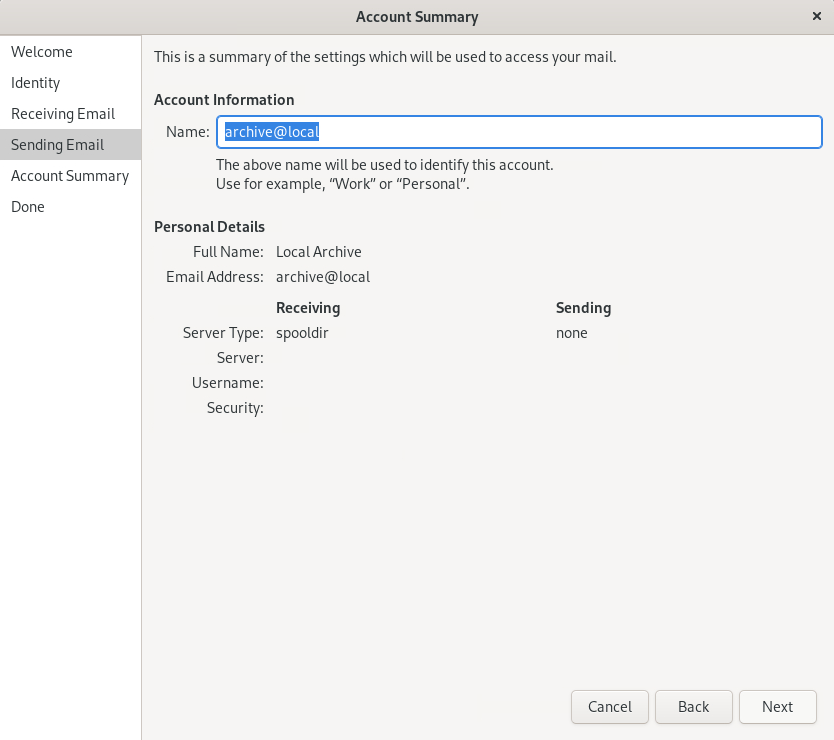
“Next” it will ask you for the name which will appear in evolution:
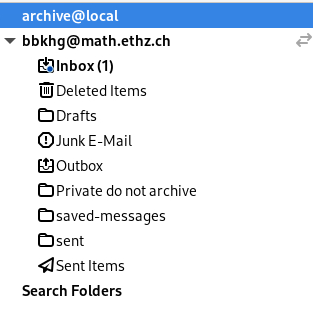
Now you have the new account:
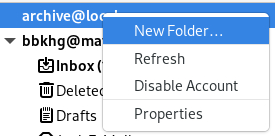
You need to create a folder now to put your mails into:
For example you can create a new one each year:
Now you can move mails from your account into this folder, they will be saved on your filesystem, so don’t forget to regulary make a backup.
Keeping your mailbox small by deleting old e-mails, particularly large or duplicate e-mails will increase the speed of access to it. For this reason and despite the Mail Archive we recommend to do a copy (best on the NAS) of the e-mails before you delete them with your e-mail client. Here below we will explain how to export single e-mails and whole mailboxes; unfortunately the procedure and/or the result are different depending on the e-mail clients used. For this reason we will focus on Outlook for Mac, Mac Mail and Thunderbird. Sadly this isn’t possible with OWA (webmail). Moreover we have a dedicated post for Evolution (e-mail, calendar and address book client for Linux).
If you use other e-mail clients that aren’t documented, please contact us – for example, below is a step-by-step guide for the Evolution Mail Client for Linux.
Important note for students
We issue e-mail certificates only to D-MATH employees (excluding teaching assistants!), and only to D-MATH students who have a good reason and whose request is supported by a D-MATH professor.
Evolution Mail Client (Linux)
Here is the configuration for the evolution mail client, which many of us use.
After ordering and downloading the mail certificate you can do the following to integrate it in your evolution mail client.
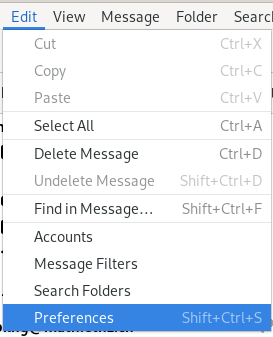
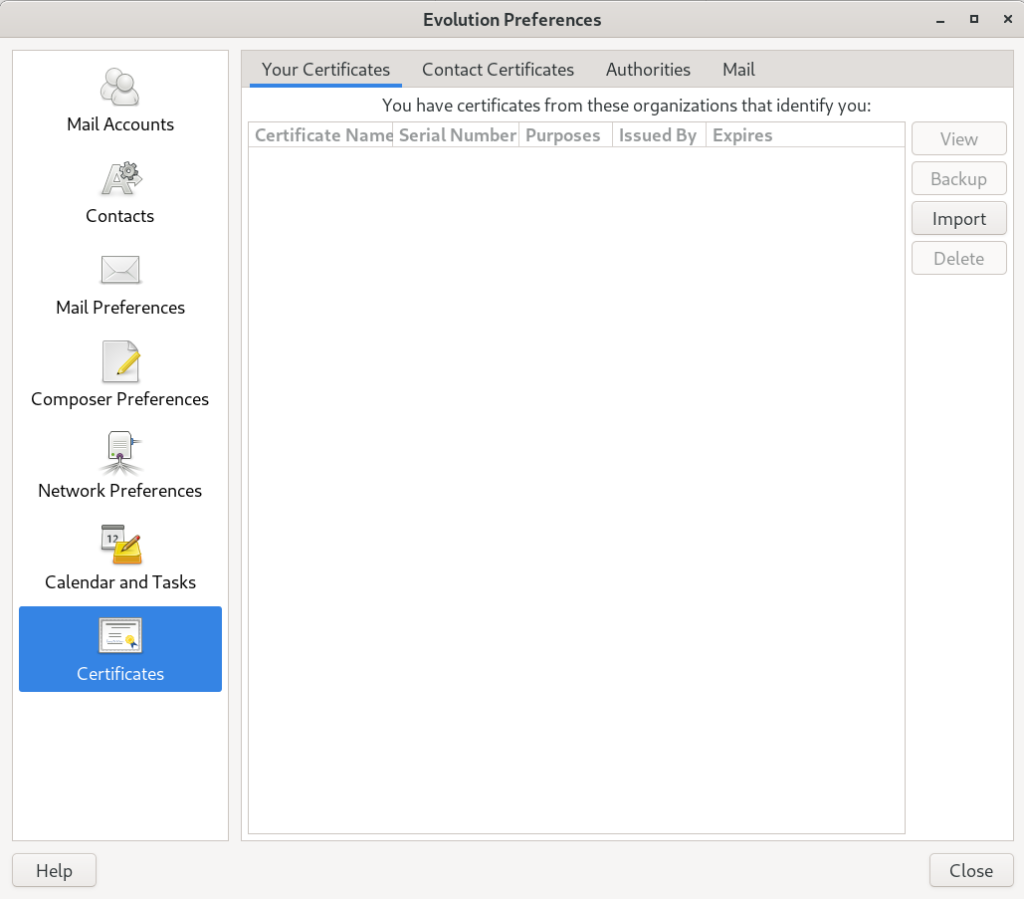
Open Evolution and go to Edit -> Preferences
Go to “Certificates” and import your certificate
You will be asked for the password, that you have received when downloading the certificate
Now you have your certificate imported
Next you need to link your mail account with the certificate, in the menu go to “Accounts”
On the left side choose “Security” and select your imported certificate for the “Secure MIME (S/MIME)” signing and encrypting certificate.
Please read the following two articles if you plan to install ETH licensed software on a private device and/or if you plan to use ETH licensed software for private purposes (like writing a cancellation letter for your flat with Microsoft Office ;-):
FreeFileSync is a folder comparison and synchronization software that creates and manages backup copies of all your important files. Instead of copying every file every time, FreeFileSync determines the differences between a source and a target folder and transfers only the minimum amount of data needed. FreeFileSync is Open Source software, available for Windows, macOS, and Linux.
Bevor ein ausgeliehenes iPad an die ISG zurückgebracht werden kann, muss ein Reset gemacht werden. Anderenfalls haben wir von der ISG keinen Zugriff auf das Gerät und können es nicht weiter verleihen.
Es wird eine Internet Verbindung benötigt um den Reset durchzuführen. Hier der Link, wie dies gemacht wird:
We offer the following standard hardware to our staff:
Linux desktop computer: e.g. Esprimo Q958 with 8-Core Intel i7
Mac desktop computer: e.g. Mac Mini with 6-Core Intel i5 or Apple Silicon
Linux laptop computer: e.g. ThinkPad X1 Yoga, ev. ThinkPad X1 Carbon; or a Laptop that is up to 4 years old
Mac laptop computer: e.g. MacBook Pro 14″ with Apple Silicon; or a MacBook Pro that is up to 4 years old
Additionally you can get 1 screen (EIZO 24″ or 27″) (upon request 2, if supported by the hardware) and a docking station and some adaptors if you have a laptop.
You can get a desktop computer more or less immediately (1-2 days). New laptops are usually ordered during the Neptun period, ie. 2 times a year (middle of February – middle of March and September). They have a delivery time of 6-10 weeks (or even longer).
If you decide to have a laptop computer and we don’t have one in stock, you can start with a desktop computer and change later or you can use your private laptop computer until the one provided by the department has arrived.
Rules
We have the following rules concerning laptops:
PhD students should contact their supervisors about the choice of model and operating system (Fedora Linux or macOS)
we only support Fedora Linux and macOS
the laptop belongs to ETH (as it is paid by D-MATH)
the laptop is managed and installed by ISG D-MATH, but you’re allowed to install additional software (but e.g. not a different operating system)
the laptop should be handled with care
repairs etc. are handled by ISG D-MATH
you can have either a laptop or a desktop; you can have an external screen, keyboard and mouse with the laptop
you don’t necessarily get a new laptop, we use old laptops again
there is no backup of the data on a laptop unless you make a backup (we can help with that)
This service is made for developing and debugging your code, not to run your code on the cluster. If you wish to run it, please use the SLURM queue system. Please only request multiple cores if you are planning to run some code that can make use of multiple cores.
You need to keep the terminal window running otherwise the portforwarding will stop. The notebook however will still be running on the “central client”, you will just loose the connection in to the webinterface.
To be able to connect to it again, it get’s a bit tricky, you need to know on which port you have started the notebook and reopen a port forwarding to it.
This can be done with the following command (you need to modify HOST=, USERNAME= and PORT=):
We explain below what you have to do to be able to work efficiently from your home, for instance how to setup a secure network connection to the ETH Zurich using VPN (eg. to access ETHIS, electronic resources like journals, file shares, …), how to access your e-mails, your files and a virtual linux desktop.
The default printer configuration on all our managed computer is black and duplex. The following OS specific instructions explain how to print color documents and are specific for the new HP Color LaserJet printers (introduced in March 2020).
With Environment Modules or simply called Modules it is possible to dynamically expand the active user environment and to remove it again without closing the shell.
If some collaborator (a non ETH member) needs to send you a big file (up to 1 GB), then you can set up a “file drop” folder using polybox and sent the generated link for the upload to the person.
On our Linux devices we are providing a Python Tensorflow Module ready to use that is accessible trough a Linux Environment Module. With the command “module” you have the possibility to add Tensorflow in many different versions. By default the newest is chosen. Read more
If several people need to access the same mailbox – for example, for a secretariat, a group organiser or a project – you need a so called shared mailbox. To get one, please contact us.
The following color printers and copiers can be accessed from all the ETH computers (incl. using VPN). We strongly recommend to use the “follow me” printer “card-hp“.
Suppose you want to protect the sub-page “secure” of your homepage with a password; that is you want that the visitors are asked for a username and a password when accessing a webpage: Read more
Central Clients are powerful computers in the server room, running Fedora. The software available is the same as on the Linux desktops at the D-MATH. We distinguish between two types of Central Clients: Compute Clients and Load Clients.
Unison is a file-synchronization tool for Linux, Mac and Windows. It allows two replicas of a collection of files and directories to be stored on different hosts (or different disks on the same host), modified separately, and then brought up to date by propagating the changes in each replica to the other.
If you are using the D-MATH WiFi or VPN configuration (with “math-guest”), you are already in the D-MATH network and can reach all important hosts directly (ex.: ssh host -l <eth-username>).
If you are using the default ETH VPN (i.e. connected with “staff-net” or “student-net”) you can simply access the D-MATH network (ex. our central clients) with SSH via pytharski just by entering the following command in a terminal:
ssh pytharski.math.ethz.ch -l <eth-username>
# or just
ssh pytharski -l <eth-username>
# and if your local username is the same as the ETH one, then
ssh pytharski
2) Open WinSCP and use the following settings under “Basic”, replacing “username” and “password” with your D-MATH details
3) Next we want to save our login details. Under “Stored sessions” click on “save” and enter an appropriate name, e.g. sftpmath. Save with “OK” then click on Login. Next time you use this program just double-click on the stored session name
4) The first time you connect to sftpmath.math.ethz.ch, the security key must be accepted, click Yes here
5) After logging in, your local windows home directory is on the left and your D-MATH home is on the right. To download/upload a file, just double-click it
Mac OS X
1) One of the SFTP-Clients for Mac OS X is called Cyberduck and can be downloaded from cyberduck.io; unzip the file and drag-and-drop Cyberduck into the Applications Folder.
2) Start the application, click on “Open Connection” and enter following information:
Drop-Down Menu: SFTP (SSH File Transfer Protocol)
Server : sftpmath.math.ethz.ch
Username : your username
Password : your password
[x] Add to Keychain (<== up to you)
More Options:
Path : home
[ ] Use Public Key Authentiation (<== up to you)
3) Click on “Connect” and then accept the host key fingerprint by also checking the “Always” checkbox.
Commandline
Follow these steps.
1) Open a terminal (xterm, gnome-terminal, …) and
2) Login
name@shell# sftp username@sftpmath.math.ethz.ch
3) On the first login, you will be asked to accept the sftpmath public server key, this should be accepted with “yes” (more about ssh key fingerprints at: ssh-key-fingerprints):
The authenticity of host 'sftpmath (129.132.119.199)' can't be established.
RSA key fingerprint is SHA256:o8jYLjJZIkG8+V474HcSdUVJTvSjYOYT3qQi8+8kFtE.
Are you sure you want to continue connecting (yes/no)?
then you will be asked for your D-MATH password:
Welcome to the 'sftp'-, 'scp'-, 'rsync'-, 'unison'-, 'svn'- & 'git'-server of
the Mathematics Department of ETH Zurich.
Your directories:
home : your 'home' directory (~)
www : your 'www' directory (~/www)
ftp : your 'ftp' directory (~/ftp)
=> ex.: type "cd home".
username@sftpmath.ethz.ch's password:
After having logged in you can access your home, ftp and www dirctories. To download a file, use the command “get“. To upload a file from the local directory where you logged in from, use the command “put“.
Following other commands can also be used on the sftpmath server:
cp, ls, mv, rm, scp, help, ...
An alternative to logging in interactively to the sftpmath server and using the above-mentioned sftp commands, is using scp. To download a file abc.zzz from the home directory on sftpmath to a local directory:
Request a Gitlab Account for People without an ETH Account
For D-MATH members to collaborate on our Gitlab Server (gitlab.math.ethz.ch) with people who don’t have an ETH account, the host needs to create a guest account via ETHIS: Read more